Showing posts with label paint. Show all posts

Flamingo Party - Party Planning Part 1 - Glitter Name tutorial

Hey everyone! So I have been doing some projects for my 21st birthday party and want to start sharing some of the things I've done so far! I saw this cute photo on Pinterest and decided to do something similar. I haven't quite decided how I am going to set them up, but I think they will be along the side of the house, hanging from the side of the roof by fishing line (surrounded by lights, lanterns, and other cute things) or something else, (I have no idea). 
I will definitely let y'all know how I end up doing it!


Supplies:
  • Wood letters (I found mine at Michaels craft store.)
  • Glue (any kind of liquid glue strong enough to hold the glitter.)
  • Gold glitter (I found a cheap jar at Walmart for like $3.)
  • Acrylic paints
  • Paint brushes/ foam brushes
  • Clear coating (I haven't done it in these photos yet.. I am waiting until I'm done with some of the photobooth props!)

 STEP ONE: PAINT THE LETTERS


I didn't do much but picked a couple different colors and designs. 
I wanted the letters to pop, obviously without the glitter they look sort of blah!

STEP TWO: GLITTER THOSE BABIES UP!


This is the size I picked of glitter. I wanted it to be BIG and FLASHY, 
especially because my party is at night and outside.

I used a foam brush to add glue to the gold upper half of the letters, 
and poured tons of glitter all over and waited for it to dry a bit before tapping the excess glitter off.


STEP THREE: CLEAR COAT.


I haven't done this step yet, I still have some other pieces to finish.

But- Here's a picture of each letter with the glitter and paint completed!

I can't wait to see how cute they'll make my cake table.

(excuse the "E", I totally accidentally dropped and broke it!)


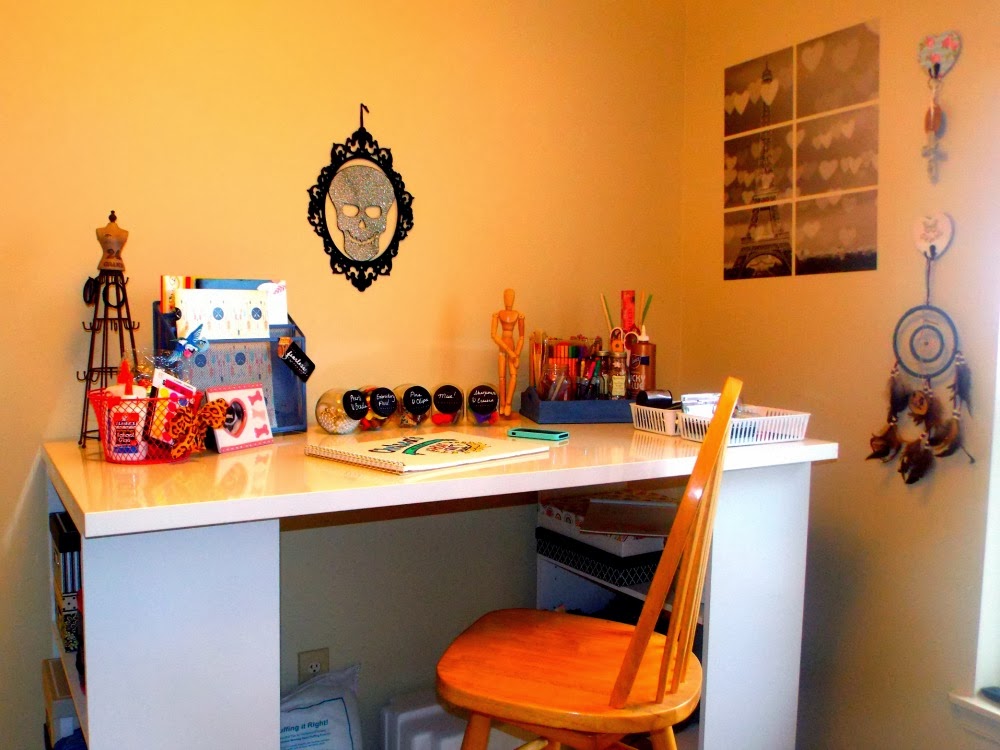
My Craft Table & Art Room Makeover!


For the past year and a half I was dreaming of having my very own art studio. I grew up with my mother and grandmother having their own, full of sewing machines and craft supplies. Heck, my grandmother had one room for DOING the crafts, and another room that was just storage for all of the supplies.. Talk about a hoarder! (ha-ha!)


  Well, I was going to ask my husband for a craft table that was $300 online, but after searching Pinterest I decided I would just ask for a home made one. We built this table for around $90 total!! We found these bookshelves at Target for $21 each & we got this tabletop at Ikea for $45. I found my stool at the thrift store for $10 (what a steal!) ...thrifted some baskets, and I got a ton of jars at the dollar tree!


The boys putting it together. :-)


This room was our "storage room."
We didn't have much in it but bags and boxes of my art stuff, and baby items.


It feels a lot better having furniture in this room finally! I can't wait to save up some more spending money to not only expand my storage space, but to fill it up with more fun goodies!

For now, I will show you what I have done to organize a lot of the little things.


I found all of this stuff at the thrift store, and decided I was going to paint it.


I found those really cute jars (they look like mini candy jars) at the dollar tree.

I LOVE THESE JARS SO MUCH NOW!


We spray painted the tops with chalkboard paint and labeled them
with chalkboard paint - pens. They're so darn cute now!


I got this basket at the dollar tree, painted it pink and added a cheetah bow..
because cheetah everything is okay in my world.


I got this file organizer for a buck, and I found really cute organizer folders at Target (not pictured). But these Seventeen brand folders were on clearance for 75 cents at Michaels.  I plan to use the folders to hold some scrapbook stuff, and misc items. (Things like my random idea doodles, lists, and whatever else I can think of.)


This cute sewing basket was originally blue and had an old poodle on it.
(Well, I'm not a poodle kind of gal.)
So I ditched the poodle, and added a skull and crossbones to be more fitting!


Not much is in here at the moment! 
I still have some bags and boxes to empty, but this will hold as 
much of my sewing things as possible. For now, it has threads and random stuff.


This cute wooden tray now holds all of the jars I bought at the dollar tree. :-)


They hold pencils, scissors, rulers, markers, paint brushes, glue sticks, etc. 
I will need more soon.... ha-ha!


So here is the top of my table :) I can't wait to make it all messy with some projects!


And here is the side! I use memory boxes to hold things, and ignore the blue basket.
It is getting it's second coat of paint soon :) We ran out of paint... lol!